Oil Painting Layer Planner
Use this tool to plan your painting sequence. Add layers and check if you are correctly increasing the oil content (Fat) over the solvent content (Lean) to prevent "alligatoring" or cracking.
Add New Layer
Painting Sequence
Key Takeaways for Long-Lasting Paintings
- Always apply paint with more oil over paint with less oil.
- "Lean" layers dry faster; "Fat" layers dry slower.
- Avoid putting a fast-drying layer on top of a slow-drying one to prevent cracking.
- Use solvents like Gamsol or turpentine for early layers and linseed oil for later ones.
The Golden Rule: Fat Over Lean
The absolute basic rule of oil paint application is known as fat over lean is the principle of applying paint layers with increasing oil content to ensure a stable, crack-free surface. In the world of painting, "fat" refers to paint with a high proportion of oil, while "lean" refers to paint with more solvent and less oil.
Why does this matter? Unlike watercolors that dry by evaporation, Oil Paint dries through oxidation. The oil reacts with oxygen in the air to create a hard, flexible film. Because different layers dry at different speeds, you have to manage the tension. If a top layer dries and shrinks faster than the layer beneath it, the top layer will literally pull itself apart, creating those dreaded cracks known as "crazing."
Breaking Down Lean and Fat Layers
To put this into practice, you need to know what actually constitutes a lean or fat layer. A lean layer is typically paint thinned with a solvent, such as Mineral Spirits or Turpentine. These solvents evaporate quickly, leaving a thin, matte layer of pigment that bonds well to the primer.
On the flip side, a fat layer is paint mixed with a drying oil, most commonly Linseed Oil. Adding extra oil makes the paint flow better and creates a glossy finish, but it also significantly slows down the drying time. If you put a lean, fast-drying wash over a thick, oily glaze, the wash will crack as the oil beneath it continues to shift and cure over several months.
| Attribute | Lean Layer | Fat Layer |
|---|---|---|
| Primary Medium | Solvent (e.g., Odorless Mineral Spirits) | Oil (e.g., Linseed Oil) |
| Drying Speed | Fast | Slow |
| Finish | Matte / Flat | Glossy / Rich |
| Application Order | Bottom / Initial layers | Top / Final layers |
| Flexibility | Less flexible | More flexible |
Step-by-Step Application Strategy
Applying this rule isn't just about the paint you buy; it's about how you build the painting from the ground up. Here is a professional workflow to ensure structural integrity.
- The Underpainting: Start with the leanest possible mix. Many artists use a Bistre or burnt sienna wash thinned heavily with solvent. This creates a map of the painting and dries in a few hours, providing a "toothy" surface for the next layer.
- Blocking In: Use paint straight from the tube or mixed with a tiny amount of solvent. At this stage, avoid adding extra oil. The paint should be buttery and consistent.
- Developing Form: As you add more detail and depth, you can introduce small amounts of oil. This allows you to blend more smoothly and create softer transitions in skin tones or clouds.
- The Final Glazes: This is where you go "full fat." Using a medium consisting of oil and perhaps a bit of resin, apply thin, transparent layers of color. These glazes provide the luminosity and depth characteristic of Old Master paintings.
Common Pitfalls and How to Avoid Them
Even experienced painters trip up on the fat-over-lean rule when they get excited about a specific detail. One common mistake is using an Alkyd Medium inconsistently. Alkyds are synthetic resins that speed up the drying time of oil paints. While they are incredibly useful, they act as a "fast" medium. If you use a traditional oil layer and then top it with an alkyd-heavy layer, you might be introducing a drying speed conflict.
Another trap is the "thick impasto" problem. When you apply a massive glob of paint (impasto) and then try to paint a thin, lean detail over it once the surface feels dry, you're asking for trouble. The deep bulk of the impasto takes months, sometimes years, to dry completely. The thin layer on top will dry in days and crack as the heavy mass underneath settles.
Managing Your Mediums
To keep your layers organized, it helps to have a set formula for your mediums. Don't just guess how much oil to add. A common progression for a multi-layer piece might look like this:
- Layer 1: 100% Solvent.
- Layer 2: 50% Solvent / 50% Linseed Oil.
- Layer 3: 25% Solvent / 75% Linseed Oil.
- Layer 4: 100% Linseed Oil or a Glazing Medium.
By following this mathematical approach, you guarantee that each subsequent layer is "fatter" than the one before it. If you find that your paint is drying too slowly to work with, resist the urge to add more solvent to a late-stage layer. Instead, consider using a Liquin medium, which provides a balance of gloss and a faster cure time without sacrificing the structural rules.
The Role of the Support and Primer
The rule of fat over lean doesn't exist in a vacuum; it starts with your Gesso. Gesso is the primer that seals the canvas. If the gesso is too absorbent, it will suck the oil out of your first layer, making it lean by default. This is actually a good thing! A properly primed canvas provides the perfect "lean" foundation for the rest of your process.
If you are painting on a wooden panel, the risk of cracking is higher because wood expands and contracts with humidity. This makes the fat-over-lean rule even more critical. A flexible, oily top layer can bend slightly with the wood, whereas a brittle, lean top layer will snap.
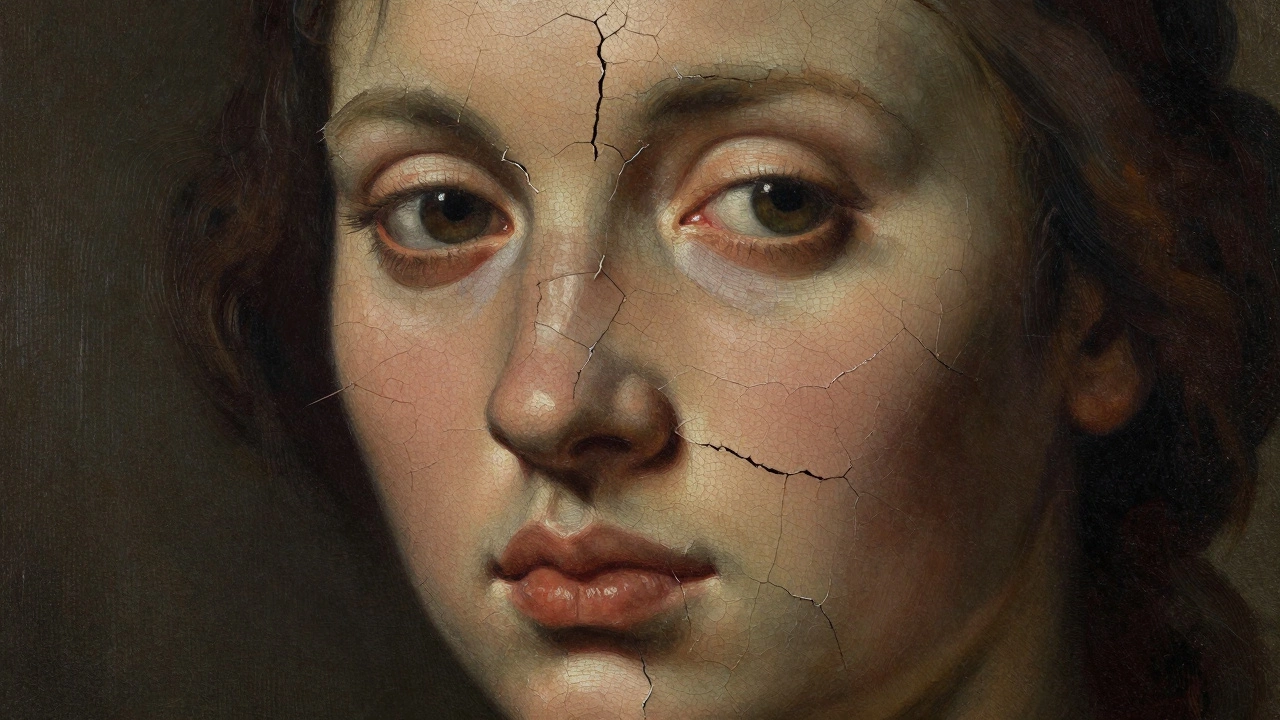
What happens if I accidentally paint lean over fat?
In the short term, it might look fine. However, as the "fat" (oily) layer underneath continues to dry and shrink over several months, the "lean" (brittle) layer on top cannot flex with it. This results in cracking, often appearing as a network of fine lines or deep fissures called "alligatoring."
Does this rule apply to acrylic paints?
No, acrylics are plastic polymers that dry by evaporation and are generally flexible. However, you should never put oil paint over acrylics if you don't want a permanent bond, but you CAN put oil over acrylic. Never put acrylic over oil, as the acrylic will peel off the oily surface.
How can I tell if a layer is dry enough to paint over?
The "touch test" is a start, but it's deceptive. A layer may feel dry to the touch (touch-dry) but still be curing internally. For critical areas, wait at least a few days. If you are using a very fat layer, it may take weeks before it is stable enough for a new layer.
Can I just use paint straight from the tube?
Yes, but remember that tube paint has a standard oil content. If you start with tube paint and then add extra linseed oil to later layers, you are still following the fat-over-lean rule. The danger comes when you add solvent to later layers, making them leaner than the tube paint used previously.
What is the best solvent for the lean layers?
Odorless Mineral Spirits (OMS) like Gamsol are highly recommended because they are less toxic than traditional turpentine and evaporate at a predictable rate, making them ideal for the initial lean stages of a painting.
Next Steps for Your Practice
If you're a beginner, start by practicing on small canvas boards. Try creating a simple three-layer study: a solvent wash, a tube-paint middle layer, and an oil-rich glaze. Observe how the surface texture changes and how the colors shift. For those moving into professional work, keep a "medium log" where you note the ratios of oil to solvent used in each stage of a large piece.
If you encounter cracking in old work, don't panic. While you can't "un-crack" paint, you can sometimes stabilize it with a professional conservator. For your current work, if you realize you've gone too lean too late, you can sometimes save the piece by adding a very fat, flexible varnish once the painting is fully cured (usually 6-12 months), though this is a bandage, not a cure.