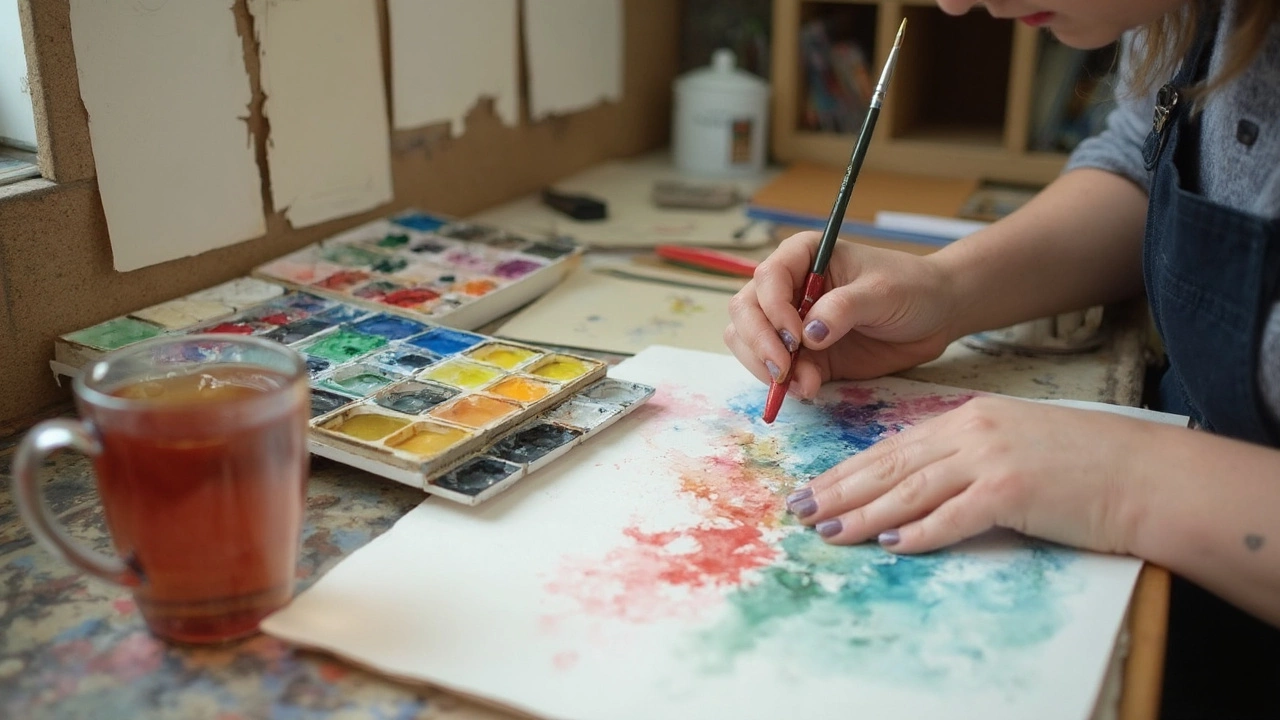
Ever try to fix a mistake in a watercolor painting and just end up making it worse? Yeah, we’ve all been there. Watercolor is famous for being tricky because once that pigment hits the paper, it likes to do its own thing.
If you’ve ever watched the color spread way past where you wanted, you’re not alone. The unpredictability is kind of the magic and the headache all at once. There aren’t many do-overs in watercolor. When you mess up, lifting mistakes can be more like smearing them. And compared to acrylics or oils, you can’t just paint over your problems here.
But here’s a cool thing—knowing these weaknesses up front actually helps you get better faster. Instead of fighting the paint, you can start learning how to work with it. We’ll dig into where watercolor falls short and what you can do so you don’t keep making the same frustrating mistakes.
- Unpredictable Results: Why Watercolor Won't Behave
- Fragile Colors and Fading Over Time
- How Water Weakens Paper
- Fixing Mistakes Isn’t Easy
- Tips for Mastering the Challenge
Unpredictable Results: Why Watercolor Won't Behave
If you’ve picked up a brush and tried to control watercolor weakness, you know how unpredictable things can get. The water just doesn’t listen. It spreads the color on the paper wherever it wants, often making hard lines or backruns—what folks call “blooms”—that can ruin clean shapes. This randomness comes from how water moves in the paper’s fibers, and slight changes in tilt, humidity, or even how damp your brush is can totally change what happens.
Gravity plays a big role too. Got a slanted table? That paint’s running downhill. The rougher or softer the paper, the more likely the pigment spreads in weird, surprising ways. It’s not just the paper either. Two brands of paint might look exactly alike until you actually use them—and then one turns into a wild puddle while the other behaves.
Check out this comparison of how different elements affect watercolor results:
| Factor | What Can Happen | Artist's Control |
|---|---|---|
| Paper texture | Rough grabs paint, smooth lets it flow | Medium |
| Water amount | Too much = blooms, too little = streaks | Low |
| Humidity | Slow drying, more blending | Low |
| Gravity | Paint runs, pooling on edges | Low |
Even pro artists run into surprises. That’s why lots of folks suggest doing quick test swatches before starting on your real piece. Knowing your materials makes a huge difference, but there’s always a bit of luck involved. If you want nice, sharp shapes or details, try letting one area dry completely before adding more paint. Masking tape or masking fluid can help too—think of them as seatbelts for your paint.
If you’re new, don’t stress too much about controlling every drop. Sometimes letting go a bit leads to effects you’d never plan but end up loving. Embrace that messiness—that’s part of the charm (and challenge) of watercolor painting tips.
Fragile Colors and Fading Over Time
The colors in watercolor paintings are always at risk. Unlike acrylics or oils, watercolor pigments sit on the surface of the paper and soak in, making them way more sensitive to light, air, and even plain old time. This makes watercolor weakness pretty obvious: fading.
The main culprit is light—specifically sunlight. Even a few months of exposure to direct sunlight can make once-vibrant details look washed out and sad. According to a study from the Smithsonian Institution, some pigments started to noticeably fade after only three months in a sunny spot. It’s that fast. Artist and restorer Tim McFarlane sums it up like this:
“With watercolor, what you see at the start isn’t always what you end up with—even if you care for it. Light and air do their job over time.”
Some colors hold up better than others. Earth tones (like ochre or umber) and synthetic pigments generally last longer, but colors like alizarin crimson or some blues can go pale shockingly quick. Labels like "lightfast" on paint tubes mean the manufacturer has tested them to resist fading, so grab those when you can.
Fading isn't just about the paint, though. The kind of paper you use matters, too. If you use regular sketch paper instead of acid-free 100% cotton watercolor paper, the colors can go yellow or dull faster, almost like they’re aging in dog years.
Want to keep your paintings bright? Check these steps:
- Use paints labeled as "lightfast" or "permanent" (Winsor & Newton and Daniel Smith are good brands).
- Frame your artwork with UV-protective glass or acrylic.
- Hang watercolors away from direct sunlight—think shady spots or even in an album.
- Pick acid-free, archival-quality paper to help colors stick around longer.
Here's a quick look at how fast some common pigments can fade under sunlight (data based on a study from conservation journals):
| Pigment Name | Relative Fading Speed (weeks) |
|---|---|
| Alizarin Crimson | 8-12 |
| Phthalo Blue | 40-52 |
| Yellow Ochre | 60+ |
| Prussian Blue | 12-18 |
If you want pieces to last, small tweaks—like better paper and UV glass—really do make a difference. Embracing watercolor weakness just means planning ahead so your colors pop for years, not just days.
How Water Weakens Paper
If you’ve worked with watercolor even for a little while, you know how annoying it is when the paper starts buckling or tearing right in the middle of your painting. Here’s the deal: watercolor weakness isn’t just about the paint—water itself is tough on regular paper. Water soaks in and literally breaks down the paper fibers. Once that happens, your surface turns soft and can’t hold the paint where you want it.
Standard printer paper is pretty much useless for watercolor. It pills, warps, or even completely falls apart with just a couple of washes. Real watercolor paper is made differently: it’s usually 100% cotton, much thicker, and sometimes even glued together along the edges for extra durability. Ever seen watercolor paper labeled “300gsm”? That just means it’s heavy enough to take on lots of water without turning to mush.
Buckling is one of the most common watercolor painting tips you’ll get: always stretch your paper. Wetting and taping your sheet to a board before starting can help it dry flat. If you skip this step, you’ll end up fighting with hills and valleys in your painting every time you lay down a wash.
- Use heavyweight (at least 300gsm) watercolor paper for best results
- Pre-stretch your paper, especially for larger paintings
- Work in layers and let each one dry to avoid tearing
- Don’t scrub at mistakes—this will rip up the paper’s surface fast
Here’s a handy comparison so you can see how different papers hold up:
| Paper Type | Weight (gsm) | Can handle lots of water? |
|---|---|---|
| Printer Paper | 80-100 | No, falls apart quickly |
| Student Watercolor Paper | 190-200 | Okay for light washes, buckles easily |
| Cotton Watercolor Paper | 300+ | Yes, stays flat and sturdy |
The bottom line? The right paper makes a huge difference, and knowing how water interacts with your surface will save you a ton of headaches. If you want to skip most of the classic paper problems, always spring for heavy, cotton watercolor paper, and prep it before you paint.
Fixing Mistakes Isn’t Easy
Ask any watercolor artist what stresses them out most, and they’ll probably say it’s messing up. Unlike acrylics or oils, where you can just layer on more paint, watercolor weakness shows up big time when you try to fix a mistake. The paint stains the paper fast, especially cheap or thin paper, so erasing or covering things up just isn’t simple.
If you need to correct an error, your options are usually limited. You can try to “lift” the pigment—that’s art-speak for using a wet brush or a paper towel to blot up the color while it’s still damp. But even the best paper only lets you do this a couple of times before it starts wearing out or looking fuzzy. And on most student-grade papers, the stain just sticks around stubbornly.
Permanent pigments are another headache. Brands like Winsor & Newton actually label certain colors as "staining," which basically means “good luck getting this off the paper.” For example, alizarin crimson and phthalo blue are notorious for sinking in deep and staying put.
Here are a few workarounds if you find you've made a slip-up:
- Act fast: The sooner you try to fix the area, the more likely you’ll be able to pull pigment off with clean water and a brush.
- Dab, don’t rub: Rubbing damages the paper fibers. Gently blot with a clean, damp paper towel or sponge.
- Use a magic eraser: Some artists have luck with a piece of a Mister Clean Magic Eraser for small oopsies, but test it on a scrap of paper first.
- Masking techniques: Mask out the areas you want to keep white with masking tape or masking fluid before painting, to avoid mistakes in the first place.
- Work from light to dark: Start with your light washes first. It’s way easier to go darker than to lighten a muddy or overworked area.
If you compare how often artists repaint, touch up, or redo sections in watercolor compared to acrylic or oil, the numbers aren't even close. In a 2023 survey of hobby artists, over 70% said they’ve abandoned at least one watercolor piece because the mistake couldn’t be saved—triple the rate for acrylics.
The blunt truth about watercolor challenges: most errors are permanent. You can get creative and work mistakes into your design, but don’t expect a flawless recovery. That’s why it pays to plan ahead and practice patience with every brushstroke.
Tips for Mastering the Challenge
If you want to dodge the usual headaches with watercolor weakness, a few smart moves can make all the difference. Here’s what works in the real world, not just in fancy art books.
- Use the Right Paper: Watercolor paper matters more than you think. Look for paper that’s at least 300 gsm (140 lb). Anything thinner often buckles or tears when wet. Those rough or cold-pressed varieties soak up pigment differently—grab some sample sheets and see which texture feels right for your style.
- Control Water Like a Pro: Mastering water-to-paint ratio is key. Most beginners use way more water than they realize. Try starting with a little pigment and adding water until you see how it behaves. Cheap plastic palettes make it easy to mix and test before you hit the paper.
- Layer Carefully: Unlike oils, watercolor painting is all about building up thin layers. Let each one dry completely before adding details—got a hair dryer handy? That speeds things up and helps control blooms and back-runs (those weird fuzzy edges you definitely didn’t want).
- Be Ready to Improvise: No matter how much you plan, watercolor likes to surprise you. A lot of pros keep a clean brush or a paper towel nearby to blot up extra color before it stains. Remember, it’s easier to add dark pigment than to lift it out after it dries.
- Protect Finished Pieces: Watercolor paintings are sensitive to sunlight and moisture. Frame your work behind UV glass if possible, or keep it out of direct light. Fixative sprays aren’t perfect but can help with fading. Make digital scans of your best pieces so you don’t lose them to a spilled coffee (it happens).
Want a sense of what experienced painters face? Here’s a quick overview:
| Common Watercolor Challenge | % of Artists Affected |
|---|---|
| Paper buckling/warping | 75% |
| Unwanted color spread | 60% |
| Pigment fading over time | 55% |
| Difficulty correcting mistakes | 70% |
The reality is that every artist deals with these bumps. The trick is to see each one as a chance to learn more about the medium rather than as a failure. With patience, practice, and these practical moves, you’ll start to turn those watercolor challenges into opportunities to get creative instead of stuck.